-1- Fragment에서 GoogleMap 생성하기, Geocoder
Google Map API키 생성 및 GoogleMap에 내용은 https://junes-daily.tistory.com/36 에서 다루고 GoogleMaps Fragment, Geocode 에 대해서 작성함
[TIL] Kotlin GoogleMaps 만들기 - 1. Activity에서 띄우기
[오늘 배운 내용] -1- GoogleMaps를 통해 MapView 만들기 - Activity에서 띄우기 1. GoogleMap API키 받아오기 2. build.gradle에 dependencies 추가 3. Manifest에 ① 에서 받아온 API Key넣어주기, 권한 받아오기( 사용자에
junes-daily.tistory.com
1. New Project 생성 후 Manifest 에서 API KEY 등록 및 user-permission 권한을 적용 한다
    <uses-permission android:name="android.permission.INTERNET" />
    <uses-permission android:name="android.permission.ACCESS_COARSE_LOCATION" />
    <uses-permission android:name="android.permission.ACCESS_FINE_LOCATION" />
2. build.gradle dependencies 추가 및 ViewBinding 적용
    implementation("com.google.android.gms:play-services-location:21.0.1")
    implementation("com.google.android.gms:play-services-maps:18.1.0")
3. Google Maps Fragment 생성
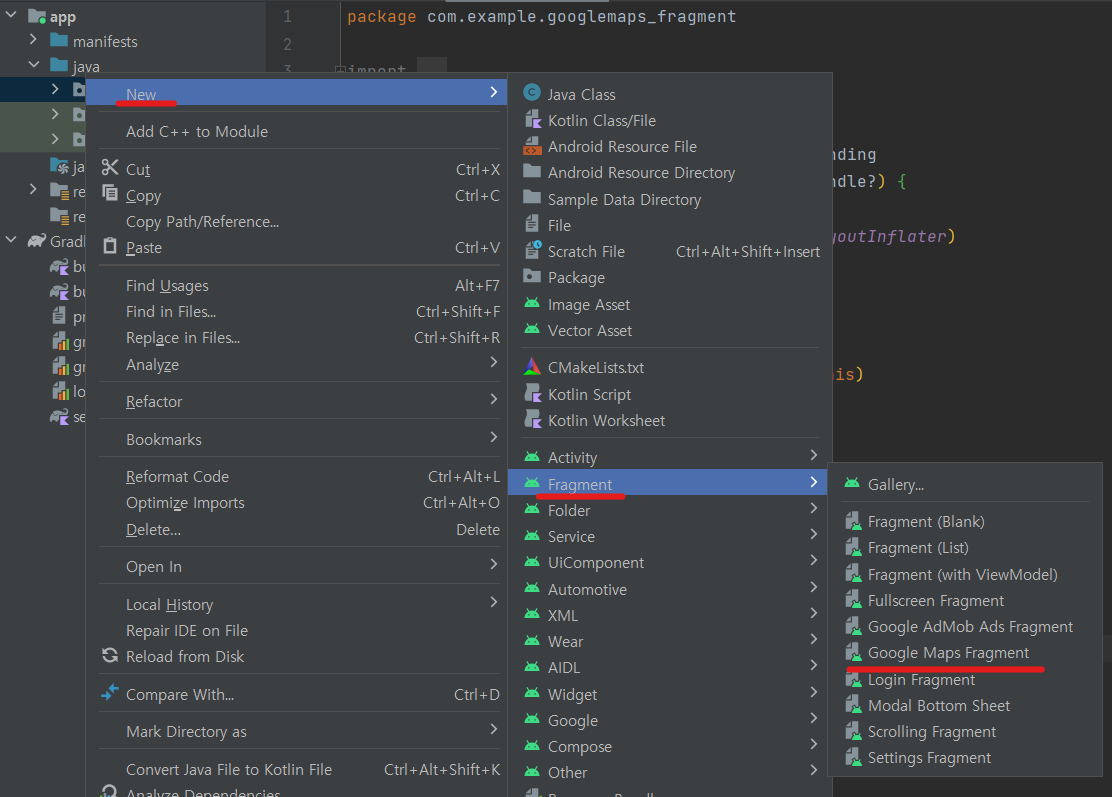
4. MapsFragment.kt
class MapsFragment(val activity: Activity) : Fragment(), OnMapReadyCallback {


    lateinit var fusedLocationClient: FusedLocationProviderClient
    private lateinit var mMap: GoogleMap

    override fun onCreateView(
        inflater: LayoutInflater,
        container: ViewGroup?,
        savedInstanceState: Bundle?
    ): View? {


        return inflater.inflate(R.layout.fragment_maps, container, false)
    }

    override fun onViewCreated(view: View, savedInstanceState: Bundle?) {
        super.onViewCreated(view, savedInstanceState)
        val mapFragment = childFragmentManager.findFragmentById(R.id.map) as SupportMapFragment?
        mapFragment?.getMapAsync(this)
    }

    override fun onMapReady(googleMap: GoogleMap) {
        mMap = googleMap
        mMap.uiSettings.apply {
            isZoomControlsEnabled
            isZoomGesturesEnabled
            isRotateGesturesEnabled = false
            isMapToolbarEnabled = true
        }

        fusedLocationClient = LocationServices.getFusedLocationProviderClient(activity)
        setLocation(37.602589,127.143674)!!.showInfoWindow()
    }
    fun setLocation(latitude:Double, longitude:Double): Marker?{
        val LATLNG = LatLng(latitude,longitude)

        val markerOptions = MarkerOptions()
            .position(LATLNG)
            .title("Here")
            .snippet("test")

        val cameraPosition = CameraPosition.Builder()
            .target(LATLNG)
            .zoom(15f)
            .build()

        mMap.mapType = GoogleMap.MAP_TYPE_NORMAL
        mMap.clear()
        mMap.moveCamera(CameraUpdateFactory.newCameraPosition(cameraPosition))
        return mMap.addMarker(markerOptions)
    }
}
- setLocation 함수 만들기
- markerOption, Camera Position 설정하기.
- MarkerOption
- latitude와 longitude 값을 받아 해당 위치에 마커를 표시하고, 마커에 title, snipper을 통해 사용자에게 정보 전달을 한다. title 해당 위치 마커의 제목으로 사용되고, snippet은 부연설명을 제공한다.
- CameraPosition
- Camera( Google Map에서 보여지는 화면 )의 위치 및 zoom 레벨
- zoom 레벨 - 0 부터 시작하여 더 큰 값을 가질 수록 지도가 더 확대 된다.
- MarkerOption
- mapType 지정
- MAP_TYPE_NORMAL
- 일반 도로 지도 - 도로 등의 중요한 특징들이 표시되는 지도
- MAP_TYPE_HYBRID
- 도로 지도와 위성사진 데이터가 동시에 표시되는 지도
- MAP_TYPE_SATELLITE
- 위성사진 데이터로 도로 및 특징이 표시되 지도 (대한민국은 위성지도 사용제한이라고 한다.)
- MAP_TYPE_TERRAIN
- 지형도 데이터로 색상, 등고선 및 원근 음영이 표시되는 지도
- addMarker(markerOption)
- markerOption 에서 설정한 Option으로 화면에 표시될 Marker 추가
- MAP_TYPE_NORMAL
- markerOption, Camera Position 설정하기.
- onMapReady 매소드 생성
- GoogleMap.uiSettings - 지도의 화면 확대, 화면 회전등의 유저와 GoogleMap UI와 상호작용 및 화면 UI 설정을 조정하는 인터페이스 이다.
- uiSettings 기능
- isRotateGesturesEnabled : Boolean
- 지도 회전 제스처를 사용할 수 있는지 여부를 설정한다.
- isZoomControlsEnabled : Boolean
- 지도 화면에 확대 / 축소 컨트롤을 표시할지 여부를 설정한다.
- isZoomGesturesEnabled : Boolean
- 확대 / 축소 제스처(핀치 줌)를 사용할 수 있는지 여부를 설정한다.
- isCompassEnabled : Boolean
- 지도 화면에 나침반 컨트롤을 표시할 지 여부를 설정한다.
- isMyLocationButtonEnabled : Boolean
- 현재 위치 버튼을 표시할지 여부를 설정한다. 해당 버튼을 누르면 지도가 현재 위치로 이동한다
- 현재 위치 권환 허용을 필요로 한다.
- isMapToolbarEnabled : Boolean
- 지도 도구 모음을 할성화할지 여부를 설정한다. 도구 모음에는 마커 및 지도 정보 공유, 지도 및 거리 뷰 전환 등의 옵션이 포함된다.
- isZoomControlsEnabled : Boolean
- 지도 화면에 확대 / 축소 컨트롤을 표시할지 여부를 설정한다
- isRotateGesturesEnabled : Boolean
- uiSettings 기능
- getFusedLocationProviderClient(this)
- FusedLocationProviderClient 객체를 얻기 위한 팩토리 메서드로 주어진 this(activity) Context를 기반으로 FusedLocationProviderClien를 생성한다.
- onMapReady 메서드에서 FusedLocationProviderClient를 초기화 하는 이유는 지도를 표시하고 나면 사용자의 현재 위치를 추적하거나 지도의 초기 위치를 설정하는 것이 일반적이기 때문이다.
- showInfoWindow()
- Google Maps 화면이 시작되었을 때 마커와 함께 지정해놓은 title, snipper 을 보여준다. showInfoWindow()를 사용하지 않을 경우 마커의 위치는 확인되지만 title, snippet은 마커를 클릭해야 확인이 가능하다.
- GoogleMap.uiSettings - 지도의 화면 확대, 화면 회전등의 유저와 GoogleMap UI와 상호작용 및 화면 UI 설정을 조정하는 인터페이스 이다.
5. MainActivity.kt
- 1. 권한 확인 및 권한 요청.
- 2. Geocoder 를 통해서 Google Map 위치 이동하기.
class MainActivity : AppCompatActivity() {
    private lateinit var binding: ActivityMainBinding
    lateinit var locationPermission: ActivityResultLauncher<Array<String>>
    override fun onCreate(savedInstanceState: Bundle?) {
        super.onCreate(savedInstanceState)
        binding = ActivityMainBinding.inflate(layoutInflater)
        setContentView(binding.root)

        locationPermission = registerForActivityResult(
            ActivityResultContracts.RequestMultiplePermissions()
        ) {results ->
            if (!results.all { it.value }){
                Toast.makeText(this,"권한 승인이 필요합니다",Toast.LENGTH_SHORT).show()
            }
        }
        locationPermission.launch(
            arrayOf(
                Manifest.permission.ACCESS_COARSE_LOCATION,
                Manifest.permission.ACCESS_FINE_LOCATION
            )
        )

        val geocoder = Geocoder(this)

        val mapsFragment = MapsFragment(this)

	// 초기 위치 지정
        var latitude = 37.602589
        var longitude = 127.143674

        // 지도 Fragment로 이동
        binding.mainBtnToMapFragment.setOnClickListener {
            supportFragmentManager.beginTransaction()
                .add(R.id.main_frameLayout, mapsFragment)
                .addToBackStack(null)
                .commit()
        }

	// 버튼 클릭시 이벤트
        binding.mainFindLocationBtn.setOnClickListener {
            val address = binding.mainInputAddressName.text.toString()
            var list: List<Address>? = null

            try {
                list = geocoder.getFromLocationName(address, 10)
            } catch (e: IOException) {
                e.printStackTrace()
                Log.d("TAG", "입출력 오류 : 주소 변환시 에러 발생")
            }

            if (list != null) {
                if (list!!.isEmpty()) {
                    Toast.makeText(this, "해당되는 주소 정보가 없습니다", Toast.LENGTH_LONG).show()
                } else {
                    binding.mainInputLatitude.setText(list!![0].latitude.toString())
                    binding.mainInputLongitude.setText(list!![0].longitude.toString())

                    latitude = list!![0].latitude
                    longitude = list!![0].longitude

                    mapsFragment.setLocation(latitude, longitude)

                }
            }
        }
    }
}- Geocoder란 지리적 위치 정보와 주소 간의 변환을 하는 데 사용된다. 즉, Geocoder를 사용하면 주소를 기반으로 위도와 경도를 가져오거나, 위도와 경도를 기반으로 주소를 가져올 수 있다.
- getFromLocationName("주소",maxResults)
- getFromLocationName() 을 통해 주소 문자열을 받아와 해당 주소에 대한 위도, 경도의 위치 정보를 반환해서 받아온 문자열의 위치를 얻는다. 예시 : 문자열 : 도쿄타워 입력 → 35.6585806, 139.7454329(각각 latitude, longitude) 반환
- maxResults는 최대 결과 갯수이다 이 값을 설정하여 반환되는 결과의 개수를 제어할 수 있다.
- Geocoder에서 반환된 latitude, longitude 값으로 mapsFragment에서 만든 setLocation으로 마커를 생성하고 이동한다.
- Geocoder가 API 33 Level 부터 Deprecated 되었다. API 33 이상은 GeocodeListener를 통해서 처리해야 함
- GeocodeListener를 배우면 추가 예정.
작동화면

[오늘 복습한 내용]
1. Google Maps
[오류,에러 등등]
특별한 오류는 없었다.
[느낀 점]
1.
2.
3.
[Reference]
// Geocoder
https://developerson.tistory.com/111
Kotlin 코틀린 안드로드 메인화면 Fragment에 구글 맵스 불러오고 주소 입력했을때 위도,경도로 변환
편집이 필요한 문서 google_maps.api.xml MainActivity MapsFragment activity_main.xml fragment_maps.xml AndroidMainifest.xml build.gradle(:app) *fragment_maps.xml은 com.example.googlemapsfragment 우클릭 > 새로 만들기 > Fragment > Google Maps
developerson.tistory.com
'TIL' 카테고리의 다른 글
| [TIL] Kotlin Navigation 라이브러리를 통해 Fragment 전환 (0) | 2023.09.21 |
|---|---|
| [TIL] 공공 데이터 API 받아오기 / Retrofit2, OkHttp3 를 사용한 간단한 앱 (0) | 2023.09.19 |
| [TIL] Kotlin GoogleMaps 만들기 - 1. Activity에서 띄우기, 현재 위치 받아오기 (0) | 2023.09.18 |
| [TIL] Kotlin 이미지 로딩 라이브러리 Glide, Coil (0) | 2023.09.15 |
| [Error] RecyclerView ImageView에 파란Image가 불러와지는 오류 (0) | 2023.09.15 |


